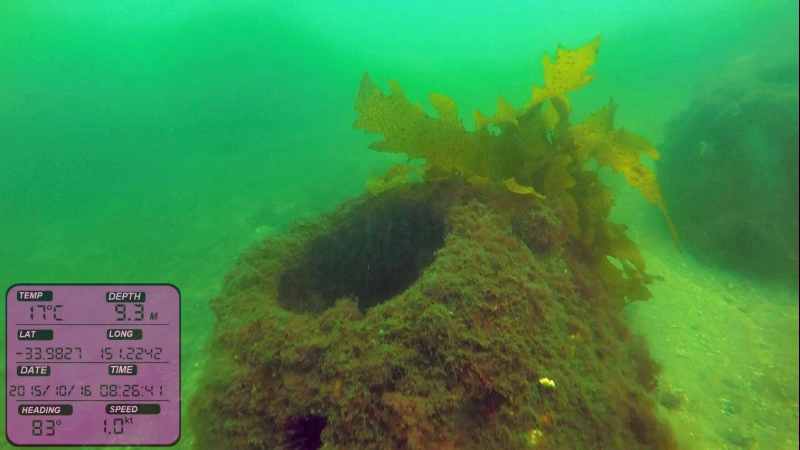
GPS overlay solutions generally fall in one of two options; they are either cheap and only work with low resolution video; or they work with HD video but are prohibitively expensive. In an attempt to offer an alternative to our customers we've been getting familiar with Dashware video overlay software. Here's a tutorial to quickly get you up and running with this software to create immersive, data rich videos, perfect for posting online, presentations, marketing etc.
Overview
Overlaying data onto your video is a great way to reference key features in your video to a data metric (eg fish species identified at a depth or positional co-ordinate). This can be done relatively easily with off the shelf video overlay devices. However, the majority of these devices work with low resolution video, and by the time the overlay device has completed its task, the video can be quite grainy and poor quality. Real-time high-definition video overlay can be achieved, however the cost is prohibitively expensive for most researchers, since you need to have a HD enabled video cable, HD video overlay device (which typically cost around $3k alone), as well as a HD recorder topside to capture the HD overlay feed. However, by using simple video overlay software called Dashware, we’re going to show you how to add a data overlay to your HD video for no cost.
The basic idea of Dashware is that you collect your video and data separately. You then use the Dashware software back in the office to synchronise your video footage with your data. The software then overlays the data to the video file, creating a new video file with the embedded data.
Equipment
Camera (we’re going to assume you are using a GoPro, but this is not essential)
Download and Install Dashware software
Hand held GPS (for this example we used a Garmin GPS MAP 78SC)
Optional additional data sensor (we collected temperature and depth data with a Suunto dive computer)
Data Capture
The type of GPS used does not matter, as long as it allows you to record your track and download the file when you’re done. Before you start your data capture, ensure your GPS is set to record your track at a suitable interval. On Garmin devices, go to Menu>Setup>Tracks. Make sure the Track Log is set to “Record, Show On Map”. Time is the easiest to work with as a Record Method and seems to work well when the Recording Interval is set to 1 second (00:00:01).
Now scroll to your Map page and make sure that one of the data fields on the page has the current position coordinates. If not, hit the menu button, hit “Change Data Field” , select a data field box, hit enter and scroll through until you find “Location (lat/lon)”. You should now see your current position. Similarly, make sure the “Time of Day” is another one of the data fields shown. Your GPS is now setup.
Video Capture
Your choice of camera is up to you, though for this example we assume you are using a GoPro. Use the best resolution you can, and consider reviewing one of our previous posts for tips on getting the best out of your GoPro. The only change in technique you need to include in order to use Dashware, is that once you start recording with your camera, you need to point the camera at your GPS (which should be showing your positional coordinates and time of day) for each video recorded. This will give you a reference point for syncing the footage later on.
Post-Processing Preparation
Once back in the office, download all the GoPro videos. Make copies of any of the videos you are going to process in Dashware, and put the copies to be edited into a working folder. Download the track file from your GPS by connecting your GPS to a computer with a USB cable. It may ask if you want to use the device as a mass storage device, select “Yes”. Navigate to the device on your computer and find the folder with track files(Garmin>Garmin>GPX). Copy the GPX file into your working folder.
Regardless of how you want to edit your video (ie trim, transitions, effects etc) it is much more straight forward to sync the complete video in Dashware, and then apply your editing. Otherwise it gets very complicated trying to sync with an edited video.
Dashware Setup
Open Dashware
Select the source of your video file and give your project a unique name in the “Quick Project Creator” dialogue box.
Within the “Project” tab, select each of the gauges listed under “Project gauges” and delete by hitting the cross button. We will be adding our own gauges later on.
Import Data
If you’re using only a GPX file, this step is super easy. Dashware has a number of profiles to match a host of data sources. Simply go to your "Project" tab, select "Data files" from the "Input settings" and browse to your GPX file. The software will recognise it’s a GPX file and apply filters to ensure it reads the data correctly.
TIP: You can create your own custom data profiles (File>Edit Data Profiles) to import data from loggers not supported within Dashware (like our depth and temperature data from the Suunto dive watch). This is not difficult and allows you to use virtually any logger you may have.
Add A Gauge
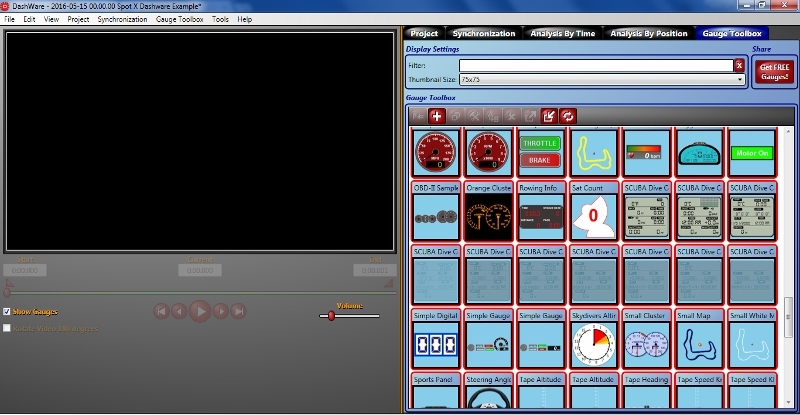
Hit the “Gauge Toolbox” tab at the far right of the screen. Here you’ll find all the stock gauges. The most straight forward gauges are the “GPS Coordinates” and “Date & Time” . We’ve customised a SCUBA gauge to include temperature, and GPS data; if you'd like to use it, you can download the gauge file here.
Drag the gauge you want to use (or import the gauge file) to the location onscreen you want to position it. You can resize by dragging, and by double-clicking on the gauge you can edit the appearance.
TIP: When you drag a gauge that has a time component, the time will populate with the time as recorded in the GPX file. Depending on your GPS setup, this may be local time or UTC, so if your time does not look right on your gauge, double-click the gauge, then double click the time component. Make sure the “Convert from GMT to local time” is unchecked.
Synchronisation
To sync data and video, go to the “Synchronization” tab. If you have recorded the GPS display to your video, scroll the video until the GPS coordinates are shown and pause the video (if you are using another cue, such as depth, scroll to where the camera just enters the water). Now hit the play button in the “Synchronization” tab. You should then see the data changing in your gauge. When the GPS coordinates on the gauge match those in the video, pause the data stream and check the “Sync with Video” check box. You can use the buttons either side of the play button to advance or rewind one frame at a time. The data and video are now synced; the play button on the “Synchronization” tab is greyed out, but when you hit the play button under your video, you should see your video synchronised with the gauge data.
When you’re happy with the synchronisation, you’re ready to render the video. Go to File>Create video, select the output source, change any of the settings if desired, hit “Create Video”. The time to render will depend on the length of video, frame rate and speed of your computer. Once it’s done you’ll have a data rich file, with an embedded, permanent record of positional data, and a much more immersive video. You can see an example of the type of video you can produce on our YouTube channel
If you’d like more info on how to add other data sources etc, please comment below or get in touch.
If you like this post, please feel free to share!


