Once of the most common queries we have at Spot X is how to/the best/cheapest way to overlay positional data to a video survey. Below are five relatively simple ways you can achieve this, with a handy table at the end of the article to quickly compare features. An important distinction to keep in mind is that some methods will simply overlay a picture (the GPS data) on top of the video, while other methods can sync video with the digital GPS data, which may be important to you for importing into mapping software, or finding points of interest at a later date.
Download a PDF version here
1.Standard Definition Overlay (visual overlay)
The most basic GPS overlay uses an “on-screen-device”(OSD) which takes a video input source (composite, standard definition video) and data source (typically battery voltage or GPS), overlays them, and then outputs a new video feed which can then be recorded. The OSD can range from $30 for a simple setup used on aerial drones, up to $300 for the Black Box Camera system which is highly customisable and can overlay positional data such as lat/long/date/time/heading/speed as well as overlay depth data from an NMEA device. Bear in mind that you do get what you pay for, and quality varies considerably between the devices; common afflictions of cheaper systems is overlay text that is difficult to read, and the output video being very low quality.

Figure 1: A highly configurable OSD makes for neat, informative final videos (www.blackboxcamera.com)
The other component that is required in this setup is a recorder, and again the choice of device makes a big difference to the video produced. While small micro-SD recorders can be found on eBay or Amazon for under $100, we prefer to use the better “game capture” types such as those made by AverMedia and Cloner Alliance, as the resulting footage is of a higher quality, and they are also more versatile (ie they can be used for other overlay methods, see sections 3 and 4 below). These devices typically record to a USB flash drive or mounted HDD/SDD, with an inexpensive 128GB card recording over 12 hours of video (depending on bit rate, resolution etc).
Summary: This method is an inexpensive, simple way to archive standard definition video with a visual record of the survey position.
TECH TIP
Not all USB flash devices are created equal, especially when recording high definition video. When choosing one for your overlay device, be sure to check the read/write rate. Your recorder will probably specify minimum requirements, however a safe option is to choose one with a write speed of at least 30 MB/s. We have had good success with the Sandisk Ultra Fit range
2. Standard or High Definition, Audio Encoded Video
An interesting method of encoding video with GPS co-ordinates is to use a specialised device to convert a GPS position into an audio signal, which is then recorded over the top of the video. Back in the office, the video/data can then be decoded to view in a GIS program or Google Earth, with an accurate location shown for each frame of the recorded video. Intuitive Circuits manufactures a device with encoder and GPS built in, making setup very simple. Note that this device won’t visually overlay data on the video feed, the data exists only as an audio feed; a separate device is required should a graphical GPS overlay be needed.

Figure 2: Typical setup for audio encoded video (www.icircuits.com)
Summary: This method is a simple and inexpensive way to sync standard or high definition video to GPS positions, though it does need an additional device if graphical GPS overlay is required
3. High Definition Overlay (using a laptop)
If you’re viewing your camera feed on a laptop (using an IP camera, or using software such as QGroundControl), one of the most basic methods of overlaying GPS data to a HD video file is to use screen capture hardware or software. All you need is a screen-capture program (eg Icecream Screen Recorder), or a HD game capture device, which connects to your laptop via HDMI cable, and a USB GPS.
TECH TIP
While it is possible to record a screen capture to your laptop HDD/SSD, game capture devices reduce the processing power required by the PC, allowing the computer to run the streaming video more smoothly, without lag or dropping frames.
If you are using an IP camera in a browser, the screen capture method basically records the browser window and a small, minimised GPS window, to create your overlay. To get the GPS window, you can download a program like VisualGPSView which will display your position in a small window, which you can place on the screen in the desired location. It’s then just a matter of pressing record on the capture device when you want to start recording.
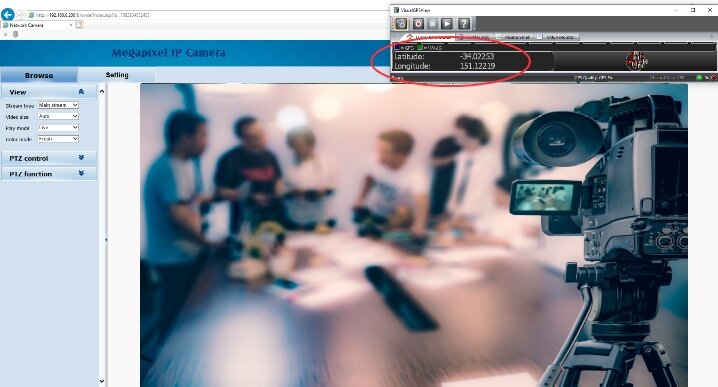
Figure 3: Minimised GPS window overlaid on video feed, recorded using screen capture software or hardware
If you are using QGroundControl, the method of screen capture will be the same, except instead of a minimised GPS window, the position will be displayed within the software in the data gauge, so that a screen capture records the video and GPS data together. To setup a topside GPS in QGroundControl, you will obviously need QGroundControl, and a vehicle running ArduSub. You will also need to download NMEA Router. Once you have a USB GPS and vehicle connected, you will need to configure the software; we put together a short video here that illustrates it best. You can see in the video that once topside position is displayed within QGroundControl, it’s a simple task to record the screen, either with a laptop screen recorder, or separate HDMI capture device.
Note, when using this method, be sure to check that your underwater vehicle is not relying on position for navigation or proper orientation. Since the position reported is only the topside position, and not the vehicle’s actual location, you don’t want your vehicle navigating using these co-ordinates. If you’re in any doubt, just use the previous method (with a minimised VisualGPSView window).
Summary: This method is a cheap and simple way to archive high definition video with a visual record of the survey position

Figure 4: Screen capture software or a HD recorder is a simple way to record a GPS overlay
TECH TIP
At the time of writing, QGC does allow you to record the video feed directly to the laptop HDD/SSD, however it does not record the data overlay (hence the need for a screen capture). It does offer another option, whereby a subtitle file of the data is produced, which can be added in post-processing
4. High Definition Overlay and Geotagging (no laptop required)
Capturing video from a HD non-networked camera source in a HD overlay is a complicated task, and needs specialised hardware. One of the market leaders in producing these devices is Video Logix. They manufacture and sell the Proteus range of HD overlay devices, with many functions, such as GPS overlay, NMEA/other data inputs, picture-in-picture displays and various other widgets. Their systems also incorporate a geotagging function, which allows you to record events of interest, and easily revisit those points in the video by simply clicking on the map within Google Earth (or similar geographic software).

Figure 5: A geotagging function will sync video to a KML file for visualisation in GIS software or Google Earth
The Proteus devices are certainly more expensive that other overlay methods, however the utility of overlaying so many data inputs, geotagging function, and the resulting high quality video file, makes them a product of choice for many professional surveyors/ROV operators etc.
Summary: This method is a relatively expensive, but highly flexible way to archive high definition video with a visual record of the survey position/other data inputs, as well as geotagging points of interest
5. High Definition GPS Overlay, Geotagged Video with Event Logging (using 3rd party software and laptop)
The final method of data overlay is a software based solution, which takes video input, and applies a GPS overlay, as well as allowing geotagging and event logging. There are a number of options available, with the offering from EIVA particularly user-friendly and flexible, with a number of compatible sub-sea vehicles and cameras. Delta ROV also make a powerful suite of programs, borne out of the demanding world of commercial working class ROV operations.
With these programs, typically the video input is an IP camera, but can be configured for a variety of camera types. The software can also accept other data sources such as pressure (depth) sensors, compass, sonar etc. The resulting output is a powerful combination of high resolution data overlay, logged events/features/data, all georeferenced and synchronised to the video file. These software solutions are an excellent solution for researchers using primarily IP or network based devices, and want to add geotagging and event logging to their HD video files. Onboard recording will capture the video stream and all data sources, making playback seamless.
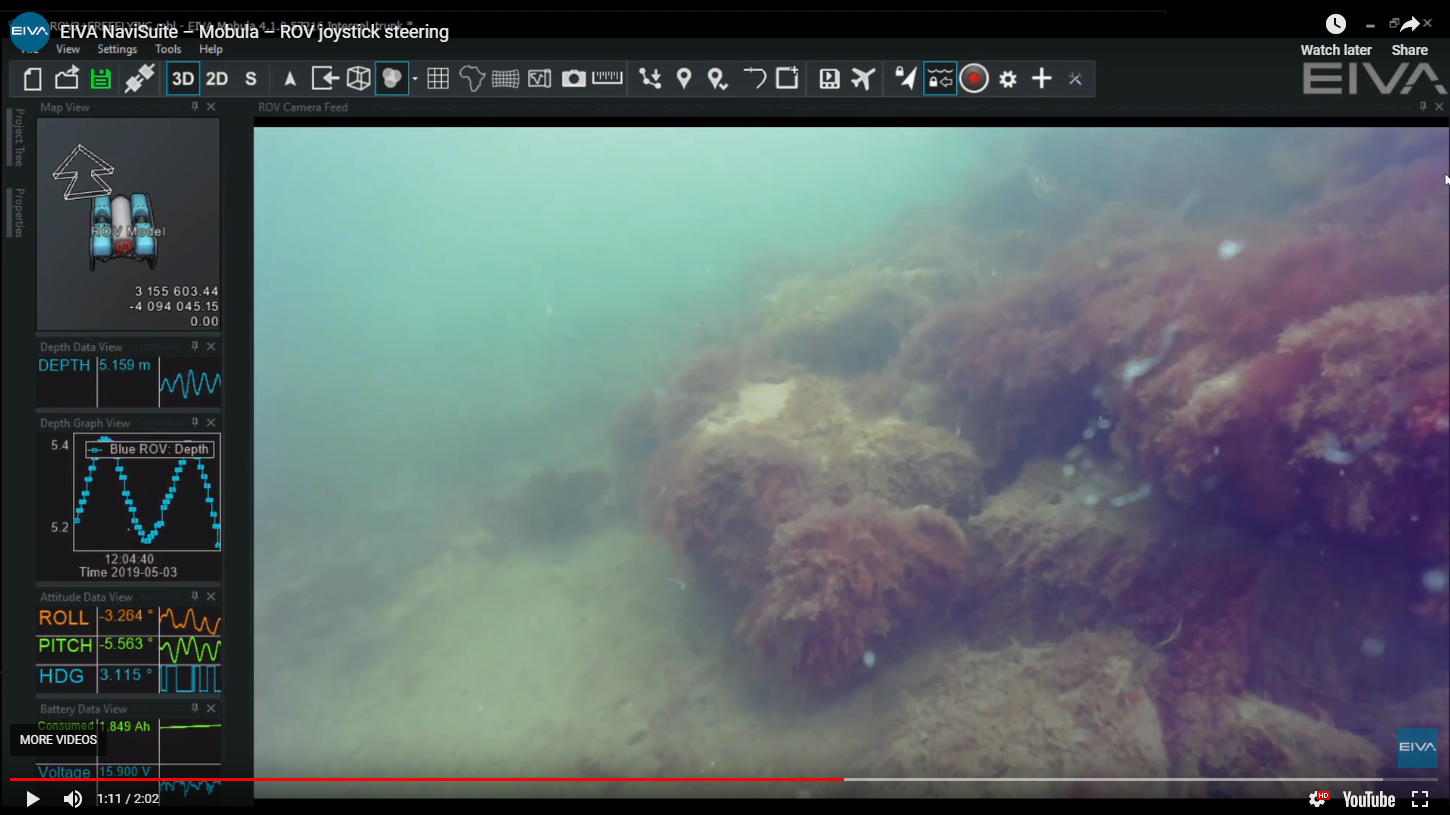
Figure 6: Third party software solutions offer a powerful method to overlay GPS data, as well as geotag events and features
Summary: Third-party software options are excellent, moderate cost options for recording georeferenced video, and logging events on most video inputs. Being a software solution, they probably offer the most scope in customising a solution specific to your needs
Hopefully this guide has helped illustrate some of the techniques that can be used to improve your video outputs. Below is a summary table of the various features offered by the different methods. If you have any comments or feedback, please leave them below. Thanks!

Figure 7: Summary table of the features offered by various GPS/data overlay methods